Blog · Back lever · 8 min read
Back lever progression: learn it without elbow pain
The back lever rewards patience more than strength. Build the shoulder range first, keep the elbows locked, and let your tendons set the pace.
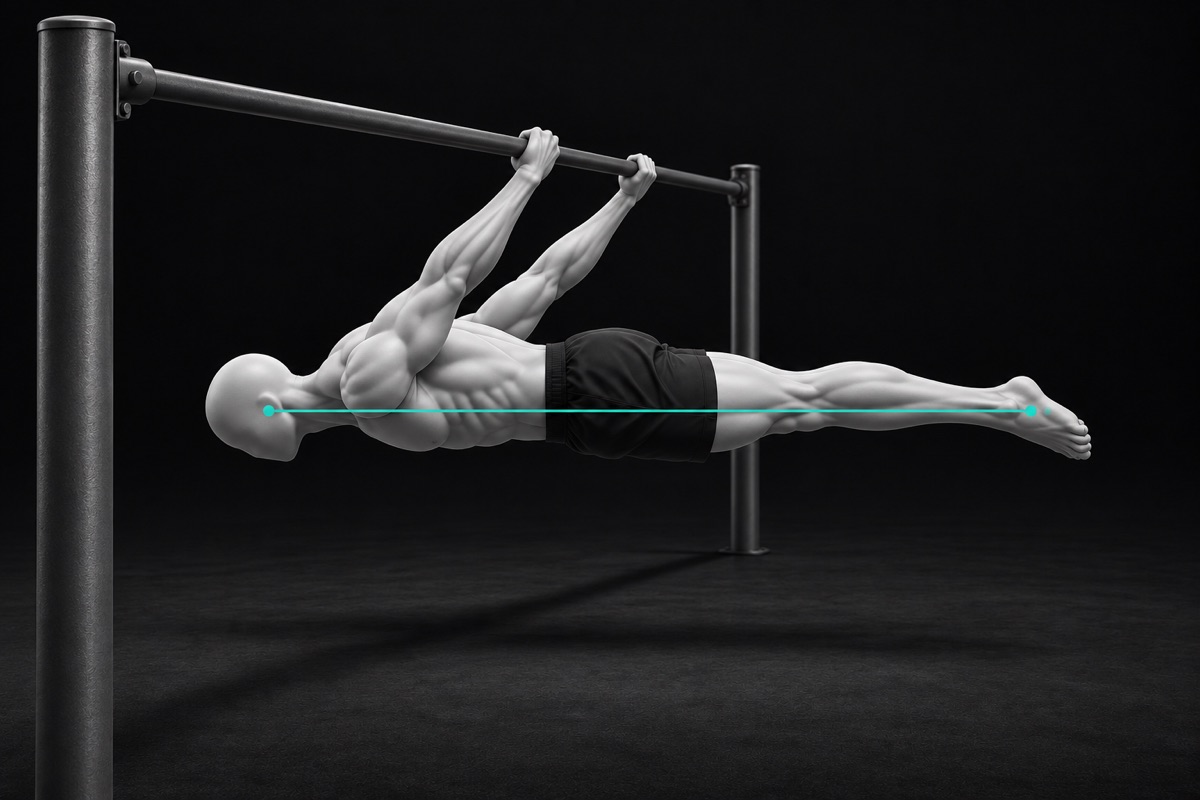
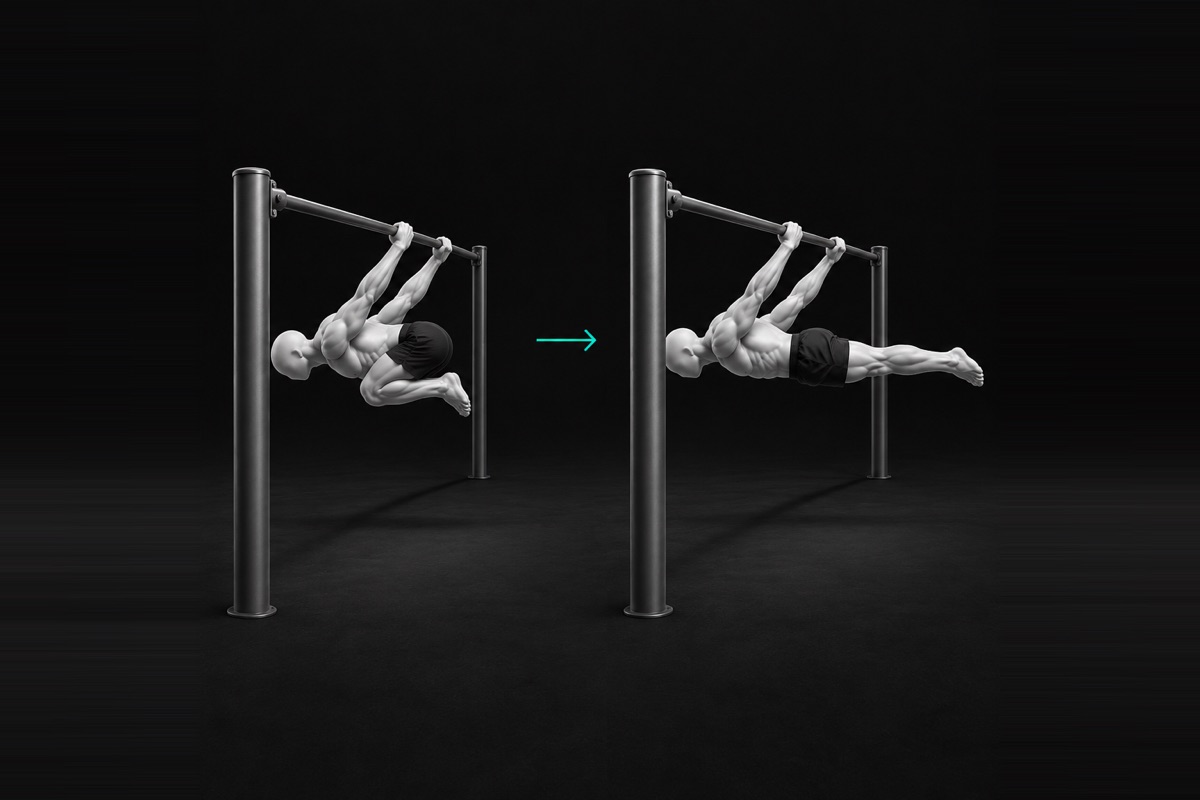
The back lever progression runs German hang, skin the cat, tuck, advanced tuck, straddle or one leg, then full. The shoulders usually cope. The biceps tendon and the elbows are what get hurt, because straight-arm holds load them in a stretched position and they adapt more slowly than your muscles. Move up one step at a time, only after 3 x 8 clean seconds.
The injury pattern is a common thread on r/bodyweightfitness. In one post, an athlete hurt the biceps near the elbow after starting at a progression that was too hard, without warming up. A moderator replied that this is a really common issue with the back lever, and another user described a partial tear that later turned into a full rupture and needed surgery.
What is the back lever progression, step by step?
Each step lengthens the lever, the distance between your shoulders and the weight of your legs. The Overcoming Gravity progression charts list the back lever on this ladder, with the level for each step:
- German hang (level 1): hang with your arms behind you and your shoulders fully extended. This is range work, not strength work.
- Skin the cat (level 2): from a hang, pull your knees through your arms, rotate down into the German hang, then come back out the same way.
- Tuck back lever (level 3): face down, knees pulled to the chest, back and hips level.
- Advanced tuck (level 4): back flat, hips partly open, knees still bent, with your feet tucked up level with your hips. Shins hanging toward the floor is the fault to watch here.
- Straddle back lever (level 5): legs straight and spread. Wider is easier, so close the legs a little over the weeks.
- Half lay or one leg (level 6): one leg straight, the other tucked, or both legs bent only at the hips.
- Full back lever (level 7): legs straight and together, one line from head to ankles.
The full back lever sits one level below the full front lever on the same charts, which is why many athletes learn it first. That makes it the more reachable of the two levers, not the gentler one on your arms.
Why does the back lever hurt the biceps and elbows?
In a back lever your arms are straight and pulled behind your body. That stretches the biceps across both the shoulder and the elbow while they help hold your weight. Steven Low writes in The Fundamentals of Bodyweight Strength Training that the straight-arm position puts the biceps at maximal length, so these skills need real strength and mass to be done safely.
The catch is timing. In his article on overcoming tendonitis, Low explains that muscles adapt faster than tendons and ligaments, which leaves connective tissue open to overuse. Your muscles can be ready for the next step before your biceps tendon is. Tendons do respond to training: a meta-analysis of tendon loading studies pooled programs lasting eight weeks or more and found the tendons got stiffer. Think in months, not sessions.
Three habits keep the risk down:
- Grip overhand first. The underhand grip loads the elbow and biceps tendon more. In a thread on grip choice, one reply called the underhand version more taxing on the elbows and biceps tendon, and said people get hurt when they rush into it.
- Warm the elbows up. Light curls, arm circles and a German hang before any hold.
- Keep bent-arm work in the week. Dips and pull-ups build the biceps and front shoulders that straight-arm work leans on.
Pain near the elbow crease or at the front of the shoulder is a stop signal, not a hurdle. Drop the back lever work that causes it, and if the pain lasts, see a physiotherapist.
How do you start with the German hang and skin the cat?
Build the shoulder range before you add any hold. A comfortable 30-second German hang is your entry ticket, and you should own a slow skin the cat before loading a tuck.
In a thread from a beginner worried about the shoulder extension, one reply came from someone who had been hurt by the back lever more than once. Their advice: start so slowly it feels silly, build to 3 x 30 seconds in a German hang with the feet on the floor, then overhand, then underhand, and stay on the tuck for a week or two after it feels easy. Another reply found 3 x 10 to 15 seconds enough and was never injured. Both agreed on going slow.
- Feet-supported German hang. On low rings or a low bar, keep your feet on the floor and lean away until you feel a stretch in the front of the shoulders. 3 x 20 to 30 seconds.
- Full German hang. Lift the feet and hang, relaxed but not collapsed. Work up to 30 seconds. Steven Low uses 3 x 30 seconds of German hangs in his warm-up for shoulder flexibility and elbow conditioning.
- Skin the cat. Rotate down into the German hang and back out, slowly, 3 x 3. On rings you can always exit by letting the rotation continue to the floor.
A stretch in the front of the shoulders is expected. A sharp or pinching pain is not: back off the depth and see a physiotherapist if it keeps coming back.
Why does my lower back arch in the back lever?
An arched lower back, the banana shape, usually means your shoulder blades pinched together instead of staying forward and down. The arch then bends the rest of the body to follow.
- Cue
- Push your shoulders forward and down, and flatten the arch.
- Why
- Pinching the shoulder blades together is what bends you into a banana. Pushing the shoulders forward flattens the line and puts the load on your lats and shoulders, where it belongs.
- Drill
- Reverse hyperextensions, 3 x 10, holding each rep 2 seconds at the top.
Set that shoulder position before you lower into the hold, and squeeze your lats and triceps together so they make a shelf under your shoulders. Hands pull toward your glutes, glutes and abs stay tight, feet together, head up.
Why do my hips sag or pike in the back lever?
Hips that sag below the shoulder-to-ankle line mean the core and glutes stopped holding the legs up. Hips that pike above it are a shortcut: folding shortens the lever and makes the hold easier.
- Cue
- Squeeze your glutes and lift your hips into line.
- Why
- A sag lets the legs drop below the line. A straight body from shoulders to ankles is the shape that carries over to the next step.
- Drill
- Dragon flags, 3 x 5, keeping the whole body rigid.
For a pike, drop the hips down to the line and accept a shorter hold. If you cannot hold a flat line, regress one step and hold that one flat for 3 x 8 seconds. The same applies to the body angle: a body tilted above horizontal is not the full shape yet, and one dipping below it means the lever is winning.
Why do my arms bend in the back lever?
Bent arms turn the hold into a biceps effort. They cap the hold before your back does, and they put even more load on the tendon you are trying to protect.
- Cue
- Lock your elbows before you lower.
- Why
- Bent arms shift the load to the biceps and limit how long you can hold. Straight-arm strength grows faster at an easier step held with locked elbows.
- Drill
- Regress one step and hold 3 x 8 seconds with the elbows fully locked.
Two smaller faults finish the list. Bent knees in the straddle, one leg or full version shorten the lever: squeeze the legs straight, and in the full version hold a light object between your ankles. Point your toes as well: it tightens the calves and helps lock the knees.
Why does my back lever swing?
A swinging back lever is still being caught, not held. You ride momentum from the entry, so the seconds you count are not the seconds your shoulders are loaded.
- Cue
- Kill the swing before you count the hold.
- Why
- Momentum hides how long you can really hold the position, and it makes you move up too early.
- Drill
- Back lever negatives, 3 x 5 seconds: lower from an inverted hang slowly enough that you arrive still, and restart the count if you start to swing.
How do you film and judge a back lever?
Film from the side. A front view hides the arch, the hip line and the elbows, which are the three things you need to see.
- Set the phone level at the height of your hips during the hold, 3 to 4 meters (10 to 13 feet) away, in landscape, with the bar and your feet in frame.
- Start counting only once you are still, not when you leave the inverted hang.
- On the video, check your elbows (locked), your lower back (flat, no banana), your hips (on the line from shoulders to ankles) and your body (level with the floor).
- Count only the seconds where all of this holds. That is your real back lever.
CaliLens checks the same points from a side-view video and counts only the clean seconds, which helps when you cannot judge your own line. For light, distance and framing, see how to film yourself for a form check.
How long should you hold each back lever step before moving on?
Move on when you hold your current step for 3 x 8 clean seconds: elbows locked, back flat, hips on the line, no swing. Judge it on video and on your last set, not your first.
For daily training, work below your max. Steven Low programs isometric holds at about 60 to 70 percent of your max hold, so a 10-second best means sets of 6 to 7 seconds. A back lever session could look like this:
- Elbow warm-up and a 30-second German hang.
- 3 to 5 holds at your current step, at 60 to 70 percent of your clean max.
- Back lever negatives, 3 x 5 seconds, in the same shape or one step harder.
- Dips and pull-ups as usual in the week.
Two or three sessions a week is plenty. If you stall on a step, a flat band at hip height for a few weeks can help you feel the longer lever, then retest without it. Even when a step feels easy, give your elbows a week or two there before the next one. For the tuck to advanced tuck jump, the same split-it-up logic as in the front lever version applies. The general move-on rule is in when to progress in calisthenics.
Frequently asked
Is the back lever easier than the front lever?
For most people, yes. On the Overcoming Gravity charts the full back lever sits one level below the full front lever. The shoulder is strong in this rear position, but it asks more of the biceps and the shoulder range, so easier does not mean safer.
Should I use an overhand or underhand grip for the back lever?
Start overhand, palms facing back. The underhand grip loads the elbows and the biceps tendon more. If you want it later, build it the same way: German hangs first, then short tuck holds, adding time slowly.
Can I train the back lever on a pull-up bar?
Yes, the bar works for every step. Rings are kinder to the wrists and elbows because they turn freely, so use them if you have them, especially for the German hang and skin the cat.
How often should I train the back lever?
Two or three sessions a week is enough. Each session, warm up the elbows, do a German hang, then your holds. Leave at least a day between sessions so the elbows and shoulders recover.
My biceps hurt near the elbow after back lever work. What should I do?
Stop the back lever work that causes it and do not train through it. Keep the rest of your training if it is pain free. If the pain lasts more than a few days, or you felt a pop, see a physiotherapist or a doctor.