Blog · Handstand · 7 min read
How to balance a handstand without the wall
Freestanding balance is a skill of its own, separate from the strength that keeps you up at the wall. Here is how to steer with your hands, enter without overshooting, fall safely, and know when your hold is ready.
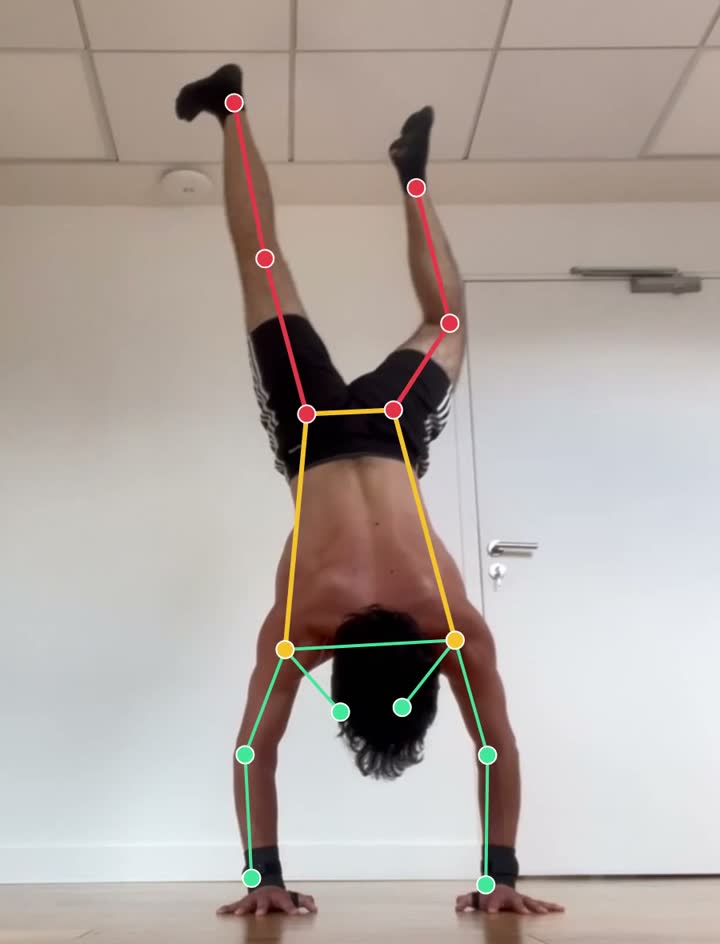
To balance a handstand without the wall, stack your wrists, shoulders, hips and feet in one line, then steer with your hands: dig the fingertips in when you tip toward your back, and push through the heels of the hands when you sink back toward your chest side. Learn a safe bail first, then practice short freestanding attempts.
Balance is what most people are missing, more than strength. Across the handstand scans analyzed by CaliLens, 46 percent were flagged as an unstable hold, and the median hold was 7.5 seconds. It is also a common complaint on r/bodyweightfitness: one athlete who can hold a handstand for two minutes against the wall is still scared to leave it, after kicking up too hard and falling on their face.
Why can't I hold a handstand without the wall?
Because the wall was doing the balancing. Against a wall you only need the strength to stay up. Freestanding, you have to catch every small tip before it grows, and most people have never trained that reaction.
Holds that last only a couple of seconds usually trace back to three parts of practice: the set-up, a kick-up whose momentum pulls you off balance, and not knowing how to bail, which keeps you afraid of falling. A loose body makes all three worse. Across CaliLens handstand scans, 47 percent showed the legs apart and 41 percent showed bent knees, and each loose leg gives your hands one more thing to correct.
How do you balance a handstand with your hands?
You balance mostly at the wrists, by moving the pressure under your hands. The hips and legs stay still, stacked on top.
A Loughborough University study of balance control in standing and handstand found that twelve national-level gymnasts relied on a wrist strategy for more than 75 percent of the time they spent balancing on their hands, the handstand version of the ankle strategy you use when standing (Blenkinsop, Pain and Hiley, 2017). Your hands work like feet:
- Tipping toward your back (overbalancing). Dig the fingertips into the floor as if you were trying to grab it. That pressure pushes your body back over your hands.
- Sinking back toward your chest side (underbalancing). Take the pressure off the fingers and push through the heels of the hands. If that is not enough, come down and try again instead of saving it with a bent hip.
- Fingers spread, arms locked. Wide fingers give you more surface to steer with, and straight arms keep the corrections in the wrists instead of the elbows.
- Small and early. A correction in the first few degrees costs almost nothing. Once you are well past vertical, only a bent hip or a step down can save you.
The hips are the wrong place to balance: bending there to catch a fall is how many athletes end up in a curved shape. Another r/bodyweightfitness post shows the pattern, from an athlete who cannot stay up more than 2 seconds away from the wall and tries to balance by arching. If your line already curves, run the two tests in how to fix a banana handstand first.
- Cue
- Spread your fingers and grip the floor.
- Why
- Constant shoulder and elbow corrections mean you are catching the balance late. A good handstand is nearly still, steered by small pressure changes through the fingers instead of big saves.
- Drill
- Freestanding holds, 5 x 10 seconds, balancing only through the fingertips and the heels of the hands.
How do you bail out of a handstand safely?
Turn out of it like the end of a cartwheel: shift your weight onto one hand, turn your hips a quarter turn and let your feet come down to the side. Learn it before you leave the wall, because the fear of falling over ruins more attempts than weak shoulders do.
Make bail practice part of your warm-up, and build it in steps, on grass or a mat:
- From a squat with your hands on the floor, hop the feet up and land them to one side of your hands. 5 on each side.
- Kick up to about half height, lift one hand, turn the hips and step down to the side. 5 on each side.
- Kick higher on each set until you can turn out of a full handstand in both directions.
A forward roll is the other exit when you tip toward your back: tuck the chin, bend the arms and roll across the upper back. Use it only on soft ground, and only once you have practiced rolls from a squat.
How do you kick up into a handstand without falling over?
With a controlled kick that brings your legs to vertical and no further. Most failed freestanding attempts are decided during the kick, before any balancing happens.
- Set-up. Hands shoulder-width apart, arms locked, and shoulders already over the hands before the legs leave the floor.
- Split-leg kick. One leg pushes off the floor while the other swings up straight. Bring the legs together only once the hips are over the shoulders.
- Too hard. The legs overshoot vertical, and you save it with an arch or a bail.
- Too soft. You fall back before you arrive, and the next kick tends to be too hard.
- Bent arms or a craned head. You arrive short of a straight line, which makes the balance harder from the first second.
Practice the entry on its own: 10 kicks per session, trying to arrive gently at vertical and pause there, even for one second.
Which wall drills build freestanding balance?
The drills that take your feet off the wall. Plain wall holds build strength and line but little balance, because the wall absorbs every mistake.
A common progression follows that logic: walk up the wall facing it, kick up with your back to it, float away from it, then kick up freestanding and practice rebalancing.
- Back-to-wall heel pulls. Kick up with your back to the wall, hands a short distance from it, and use finger pressure to pull the heels off. Hold as long as you can, then let them return. 5 x 5 to 10 seconds.
- Chest-to-wall toe floats. Walk up facing the wall, hands close to it, and use hand pressure to float the toes off for a few seconds at a time. 5 x 5 seconds.
- Leg squeeze holds. Chest to wall, a yoga block between the ankles, toes pointed. 4 x 20 seconds. This is the fix for legs that drift apart once you are freestanding.
How often should you practice handstand balance?
Often and fresh: short sessions several times a week, many short attempts, placed before the tiring part of your workout. As a coaching estimate, 2 to 4 sessions a week of 15 to 20 minutes each is realistic for most people.
Fatigue works against you. In a 2024 study of 14 acrobatic gymnasts, fatigue increased side-to-side sway measured under the hands on a force platform (Sabido and colleagues). Put balance work early and stop when the attempts get sloppy instead of grinding more. A typical 20 minute block:
- Wrist and shoulder warm-up, 5 minutes.
- Bail practice, 3 to 5 on each side.
- Kick-up entries, 10 attempts.
- Back-to-wall heel pulls, 5 x 5 to 10 seconds.
- Freestanding attempts for the remaining time, resting 30 to 60 seconds between them.
How do you test your handstand balance on video?
Film your freestanding attempts from the side and count the still seconds, not the total seconds.
Place the phone 2 to 3 meters to your side, at about hip height, with your whole body in frame from hands to toes at the top of the kick. Film 5 attempts and note three things for each one:
- The moment your feet arrive over your hands.
- The first big correction: a bent hip, bending elbows, a hand that walks or legs that split.
- Which way you came down: toward your back or toward your chest side.
The time between the first two is your still hold. If you mostly come down toward your back, your kick is too strong or your fingers are too quiet. If you mostly fall back toward your chest side, the kick is too soft or the shoulders stay behind the hands. The full setup, including light and distance, is in how to film a calisthenics form check.
CaliLens scores freestanding handstands from this side view: the hold time, whether the hold is stable, and the line faults that shake a balance, such as legs apart, bent knees or a body off vertical. It has no wall handstand variant, so scan your freestanding attempts.
When is your handstand balance good enough to move on?
When you can kick up and hold a still, freestanding handstand for 10 seconds, legs together and hands quiet.
That hold opens the next steps: longer holds, shape variations and freestanding pressing work. If your goal is the handstand push-up, you can build the strength long before your balance is ready, as shown in from pike push-ups to handstand push-ups. The general rule for moving up is in when to progress in calisthenics.
Your wrists take the load on every attempt. In a 2025 survey of 321 adults who practice handstands, 56.7 percent reported chronic wrist pain (Martonovich and colleagues). Warm the wrists up before each session, and if they hurt during handstands, stop the painful variation and see a physiotherapist if the pain persists.
Frequently asked
How long does it take to learn a freestanding handstand?
It varies a lot from person to person. As a rough coaching estimate, many adults need several months of regular practice, 2 to 4 sessions a week, before they hold 10 still seconds. Learning to bail early shortens the fearful phase that slows most people down.
Should I learn the handstand against a wall first?
Yes, for strength and body line, but do not stay there. Wall holds teach you to stay up and straight, not to balance, because the wall catches every mistake. Add heel pulls and short freestanding attempts once a 30 second wall hold feels comfortable, a common coaching bar.
Why do I keep falling over in a handstand?
Usually because the kick is too strong or the fingers stay passive. Kick more gently so you arrive at vertical, and dig the fingertips into the floor as soon as you feel yourself tipping toward your back. Practice the cartwheel bail so that falling over stops being scary.
How do I stop my legs from moving in a handstand?
Squeeze them together and point the toes, so the legs move as one block. Legs that split or bend shift the weight and force extra corrections. Wall handstands with a yoga block squeezed between the ankles, 4 x 20 seconds, train that squeeze.
Should I practice handstands every day?
Short daily practice works for some people if their wrists tolerate it, but 2 to 4 focused sessions a week is a common recommendation. Keep the attempts fresh and end the session when they get sloppy.